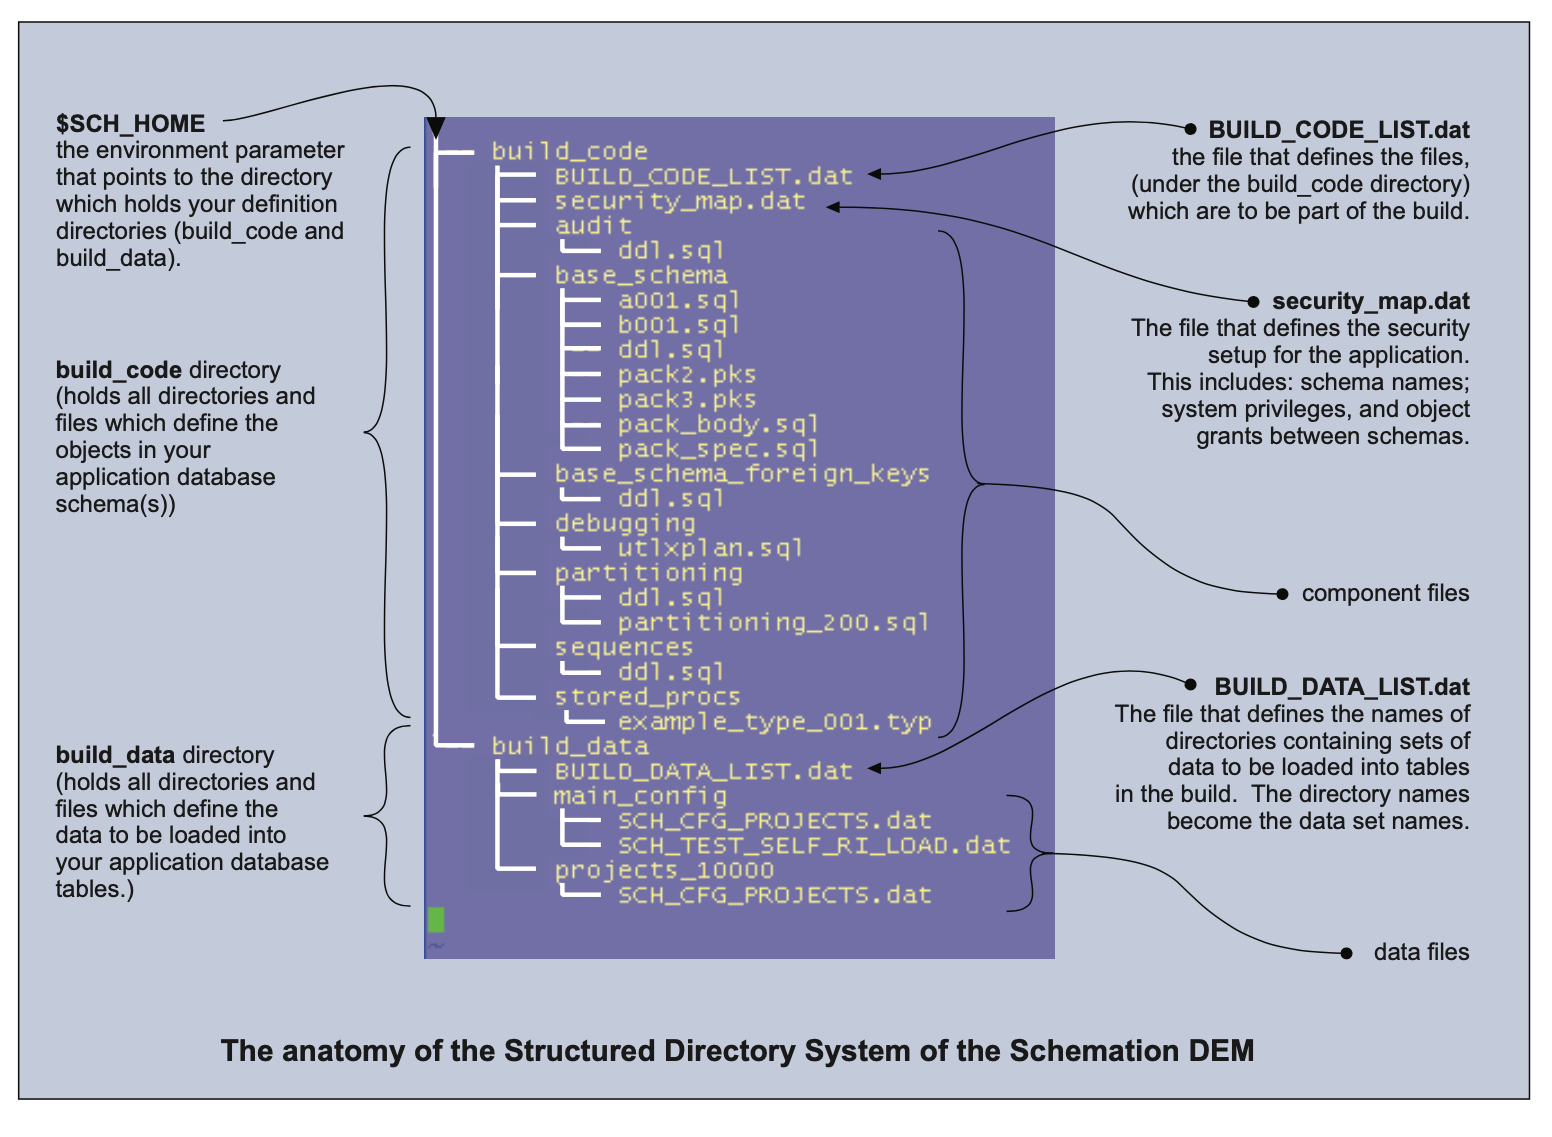
Schemation Directory Structure
When the Schemation Custom Build process is run from the operating system, it expects all definitions and data to be organized in a specific directory structure. This structure is rooted at the location defined by the SCH_HOME environment variable.
Note: The user running the build must have read and write access to the SCH_HOME directory.
During the build, the Schemation DEM build process will create temporary working directories within $SCH_HOME, typically prefixed with work_. These directories are used internally and can be ignored unless you're investigating a build issue. It's important not to modify or delete these directories while a build is running, as doing so may disrupt the process.
The directory names which are created, and their purposes are shown below.
If you are starting with an existing database, to make setup easier, the Portable Schemation Export utility is provided. This tool automates the creation of the required directory structure, extracts object definitions and data from your database schemas, and generates everything needed to run a build—including a security map. With one execution, it prepares a ready-to-use environment that aligns with the expectations of the Schemation Custom Build process.
Working Directories created at $SCH_HOME
working_log
This is used to create SQL*Loader log files which are created as part of the build.
working_data
This is used to temporarily store data files which are to be loaded during the build.
working_ctrl
This directory is used to create SQL*Loader control files for loading data and build code during the build process.
working_sql
This is used to create a set of statements which are executed as part of the build. These statements are usually Schemation DEM administration commands.
Definitional Directories at $SCH_HOME
Two definitional directories are required at the top most level:
* build_code
* build_data
You have to make sure that:
* all code required to define your environment is placed under build code.
* all data files required for your environment are placed under build data.
And so we have two separate areas, under the $SCH_HOME location which hold the full DDL and data for your environment. Let’s start by explaining how to define your schema build DDL.
Defining the Build Code (DDL)
In the build code directory, the Schemation DEM looks for a file called BUILD_CODE_LIST. dat.
If this file is not present this is an error and the DEM will exit with an error message. The BUILD_CODE_LIST. dat file becomes a menu of directories where the DEM must look for files containing database object creation commands. The commands it finds (in these files) will be standard SQL commands presented as text - the sort of command you would expect Oracle's SQL*Plus utility to process.
It is important to note that the BUILD CODE LIST.dat file contains the names of DIRECTORIES in which the DEM may find source files. It does not contain lists of files neither does it contain commands themselves.
There are four main functional areas of the BUILD CODE LIST. dat file: the version control line; the code module list; the pre_data_load section and the post_data_load section.
These are shown in the example BUILD_CODE_LIST. dat file shown in the diagram below.
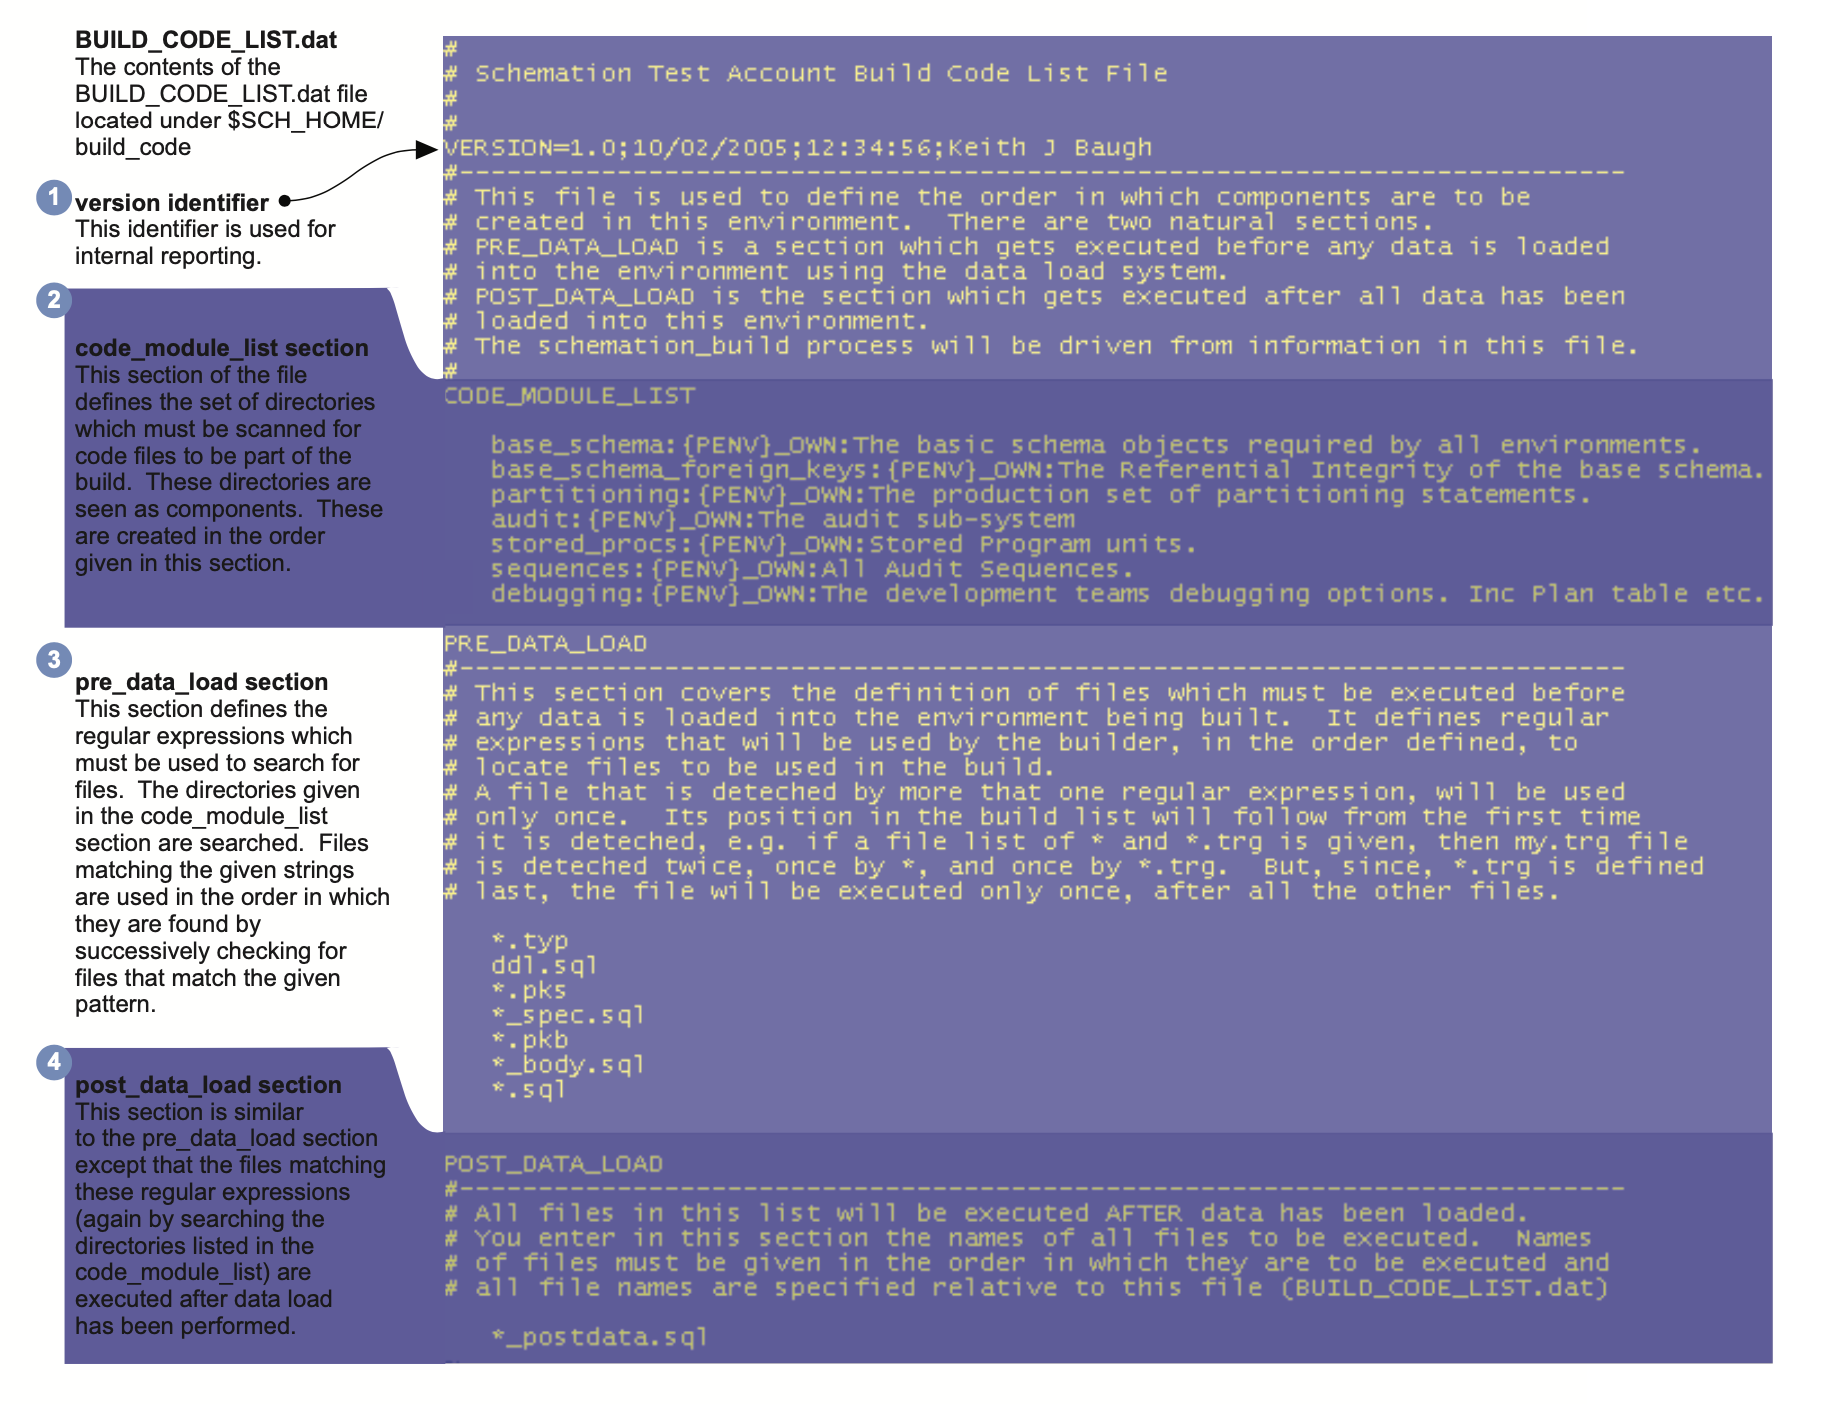
Version Identifier
Defined by the keyword: VERSION
This section is the simplest of sections and comprises a single line of text. All text following the VERSION= construct is copied into the DEM and is held against the enviornment built to represent whatever version naming convention you chose to employ.
Code Module List
Introduced by the keyword: CODE_MODULE_LIST
The code module list section defines which code modules must be created in the environment. The order in which the module names appear in this list dictate the order in which the modules should be created at build time. Each entry comprises three fields separated by the colon character:' with fields identified as:
{directory _name}: {owner}: {description}
where
{directory name} is the name of the directory under $SCH HOME/build code containing files to be executed.
{owner} is the name of the schema which will own all obiects created by files found in that directory. (See later notes on the security map)
{description} is a text description for the set of commands grouped in this directory.
When used to build a Repository type Environment, the directory name is presented as a module name and the description is presented for the user to understand what components are in that module. It’s best to make the description clear and understandable by your users.
Pre Data Load
Introduced by the keyword: PRE_DATA_LOAD
This section defines a set of search expressions that the DEM should use to search your code module directories for files containing DDL commands. It may be considered to be an ordered list of regular expressions that the DEM will use, to discover files which are a part of your build.
Each new expression should be listed on a new line.
Files discovered are only processed once and their order follows from the first expression that matches the file. So, for example, in the example shown above all files ending with .typ will be processed first, followed by files called ddl.sq| and so on. This section tells the DEM how you define your files and the order in which the DEM should process your source files to build your enviornment.
All files discovered by these expressions will be processed ahead of loading any data.
Post Data Load
Introduced by the keyword: POST_DATA_LOAD
This section defines a set of search expressions, as above, which map to files to be executed following the loading of data into the environment.
Each new expression should be listed on a new line.
Files discovered are only processed once and their order follows from the first expression that matches the file.
Files that are listed here are executed after all data has been loaded, it is a useful place to locate scripts that need data to be present before they run, for example a sequence reset script that has to be synchronised to data loaded would have to run only after the data is loaded.